Showing posts with label Up-do's. Show all posts

Monday, April 23, 2012

My Bountiful Bride Marla

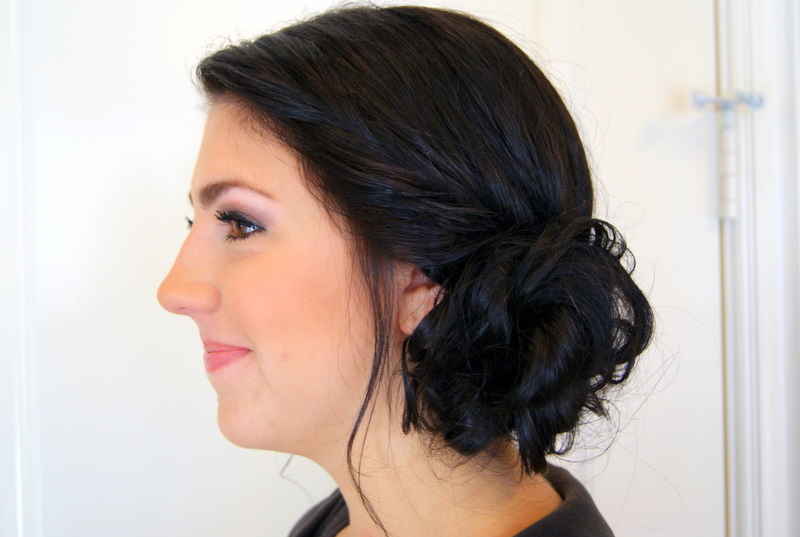
This beautiful Bride I have known for many years! We grew up in the same city and then eventually moved to Utah. She was married to an amazing man on April 21st. I am so glad I was able to dazz her hair and make up for the BIG day!

Congratulations Marla!

A nice side swept up-do with lots of twists and curls for a sunny Spring Wedding. First I added some extensions in before curling her hair which made it so long and thick! She looked stunning! 

And since she already has that gorgeous tan skin I added some light pink shimmer/highlights to her cheeks and shadowed her eyes with a dusty brown. We mixed two colors for her lips, a purple rose color and a bronze. 


Saturday, January 21, 2012

Curl Back Up-Do

Natalie was also a bridesmaid for McKenna's wedding this past weekend. She fell in love with this style and it look amazing on her.


Curl all your hair and make a small side bun with the bottom half of your hair. The rest curl back and pin carefully so the curls keep shape and wrap the ends around or next to the side bun you made. Continue around the whole head.


Inside-Out French Braid Up-Do

Brookie made a stunning bridesmaid for McKenna's (Bride who is posted previously) Wedding. She wanted something up, off her neck since her dress had a high collar.


Begin on the side of the hair your hair is not parted to and start the inside-out french braid. Continue braiding around the head and until you reach the other side and add the rest of the hair and braid to the ends. Lay the braid flat and secure with bobbi pins.

You can either pin your bangs back or . . .


leave some down. We pinned them back for the wedding day so we would not have to worry about the wind blowing her hair in her face.

Brides French Fish Tail Up-Do

This is my beautiful Bride McKenna. She was just married over the weekend to a wonderful young man and I wish them all the joy in the world!

For her Bridal pictures, we decided to do a french fish tail.


Start by curling all the hair to help give movement and volume. Then you begin the french fish tail braid and go to the ends of the hair and secure with an elastic. Pull apart the fish tail and tuck the end to the side of the head. We left out hair in the front to frame her face and she had a gorgeous headband to add.

Monday, January 2, 2012

Double French Braid

This is my friend McKenna, a soon to be BRIDE! I am so excited for her! We did a sweet, double braid up-do for her shower last weekend.

With a loose french braid down the front left side into a messy bun.
Check out the back! I love how much more is added with the second braid.
To get this look braid the top braid first then secure with an elastic, then
braid the second one underneath and secure as well, leaving out the front section of your hair down to your ear so you can put a loose french raid in that to meet up with the other two. Then put an elastic around all three braids and take out the other two elastics so you can make the messy bun. Pin in place and you are set!

Wednesday, December 28, 2011

Ali has beautiful long, blonde hair and loves the fish tail trend so I did a double, french fish tail braid that wrapped into a sleek, straight pinned bun.


I love how you can see the fish tail through the straight hair.


Braid headband and Ombre

Ombre is a great way to lighten up any dark hair without having to worry about your roots showing or it growing out too quickly.

Meet my younger sister Jessica. She is constantly changing her hair color and always wanting a new style. This is a great on-the-go style.

Start by curling all your hair. Then gather hair from the opposite side of your head and braid it to the very end. Gather all the hair and use a clear elastic band to hold and wrap a thin strip of hair around the elastic and pin in place.
Hannah was so much fun to work with. She knew exactly what style she wanted and had a book with the picture ready! We did a simple look that is great for a quick morning or a last minute invite to an event. Just a side french braid into a loose bun with a few hair accessories and voila! You are set and ready to go!


Up-Do with Pinned Back Curls

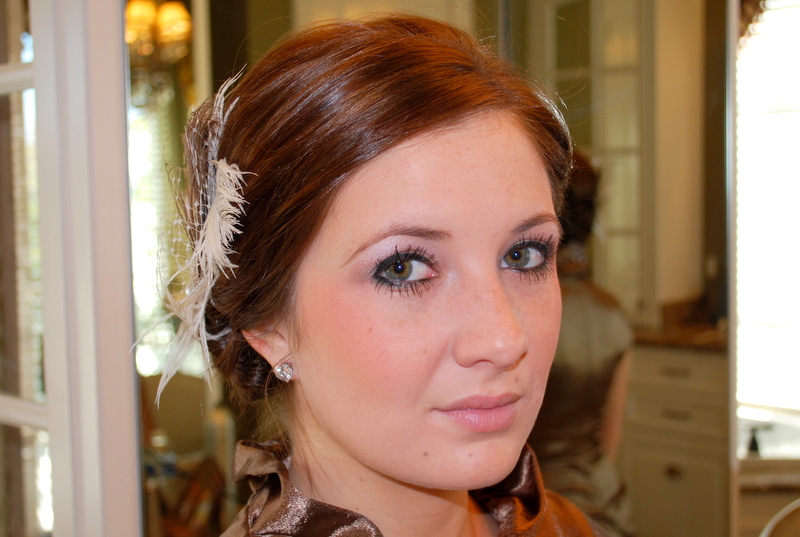
Look at this beautiful red hair that is 100% natural! This is my friend Chelsea, who recently got engaged and is planning for her summer wedding! I am so excited for her.

She has long, thick, sleek hair and I really wanted to show her an up-do since she has never had one before. I put a side twist that gathered in the back with the rest of the hair and pinned back some loose curls on the other side and back of her head. With all the extra weight and length left in the back of her head I pinned it in a loose, classy bun and added an accessory.


I hope this style gives you lots of inspiration!
(as a tip, I used mostly the Extra Large bobbie pins to help secure her hair)

Thursday, December 22, 2011

Twist Up-Do

I'd like you to meet Haylee. We did a super quick and easy twist up-do in her hair. Simply part the hair, twist back both sides and continue twisting until you reach the ends of the hair. Twist them together into a bun and Put a Pin in it!


Half-Up Braid and Twist

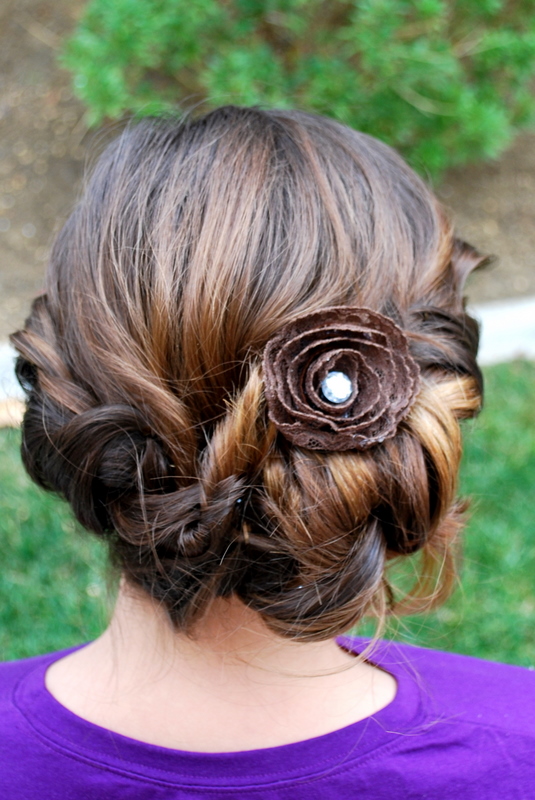
Here is Aubree. She has natural blonde hair that grows crazy fast and is always trying new cuts and styles. I love this simple style and it works great on so many hair lengths!

I did a twist back on one side and a french braid on the other then gathered them at the back and started wrapping and tucking the hair.
.

French Twist Up-Do

This is my youngest sister Taylee. She loves her hair pulled up and out of her face and was excited to get a fancy up-do . . . and get her picture taken. Isn't she so cute!

With a side part, french twist both sides of the hair to the back of the head. To give it an off-to-the-side kind of look, gather the hair to the same side that you parted the hair. Then start pinning the twists and curls up.

After getting all the pins in, I took my fingers and loosened up the hair to give it a more messy look.


Monday, December 12, 2011

Side Fishtail & Up-do's

I love this trend with all the different types of braiding and how creative people are getting with it. On this Blog I am going to show you a variety of braids and ways to style your hair or just give you some good ideas for times when you need to get your hair done for a special occasion or event! You can dress a braid up or down for any occasion and its something great to add to simple hair that's done in a hurry to make you still look finished.

Here I did a side fishtail into a messy side bun. Once I finished with the braiding, I started from the bottom of the fishtail and began to loosen the hair and continued all the way up the braid to give it a more bohemian look.

This is a more polished look but you still have volume and it's not slicked down to her head. The trick here is to begin with your hair curled and hair sprayed. Next, pull up the top section of your hair to get that lift and Just Put a Pin in It. This look is great for people with long or medium length hair.


This style is great for any length of hair past your shoulders and longer. I started by added a light curl over her whole head to get the right section thickness in the front to keep down. To get this curl I wrapped her hair around a skinny curling iron.


Good Luck with your up-do's and styling!

*If you have any questions or want to request to see a hairstyle leave me a comment!

Karilyn